Difference between revisions of "Part 1: Sign up and Login"
From AgileApps Support Wiki
Wikidevuser (talk | contribs) |
Wikieditor (talk | contribs) |
||
| Line 20: | Line 20: | ||
##:When you first create your tenant, by default you are given all privileges as specified by the Administration access profile. You learn more about Access Profiles later in this course. | ##:When you first create your tenant, by default you are given all privileges as specified by the Administration access profile. You learn more about Access Profiles later in this course. | ||
## Click '''Save'''. | ## Click '''Save'''. | ||
# As you work with the AgileApps platform, you can access the online help by going to the '''Configuration''' page, under the '''Help''' section, clicking '''Learn More''', OR by clicking '''Help''' under the Profile on the upper right corner of the '''Overview''' page.<br><br>[[File: | # As you work with the AgileApps platform, you can access the online help by going to the '''Configuration''' page, under the '''Help''' section, clicking '''Learn More''', OR by clicking '''Help''' under the Profile on the upper right corner of the '''Overview''' page.<br><br>[[File:Configuration_page_Learn_More.png|1000px]]<br><br> | ||
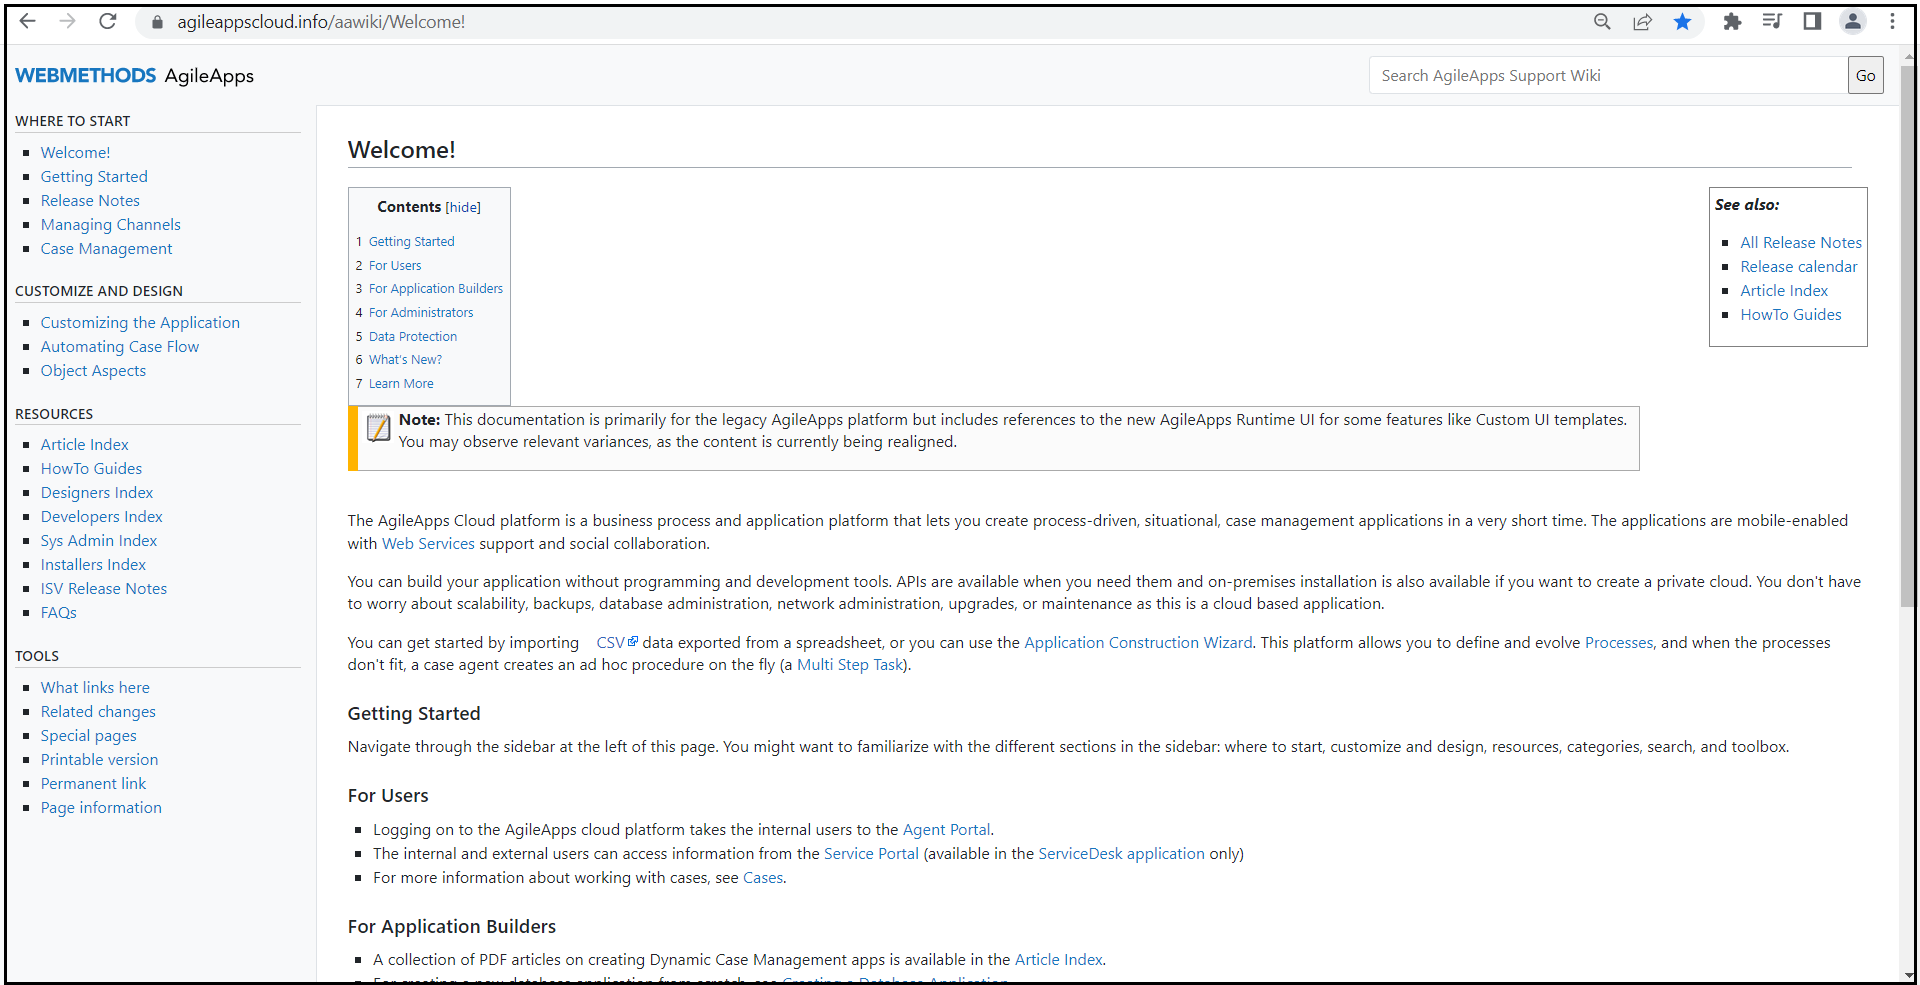
#: The AgileApps Cloud main wiki page appears in a separate Web browser tab:<br><br>[[File:AgileApps_Wiki.PNG|1000px]]<br><br> | #: The AgileApps Cloud main wiki page appears in a separate Web browser tab:<br><br>[[File:AgileApps_Wiki.PNG|1000px]]<br><br> | ||
------------------------------------------------------------------------------------------------------------------------------------------------------------------------------------------------------------------------------------------------------------------------ | ------------------------------------------------------------------------------------------------------------------------------------------------------------------------------------------------------------------------------------------------------------------------ | ||
Revision as of 07:11, 11 July 2023
In this part of the exercise, you must sign up for a trial webMethods AgileApps Cloud account and log in:
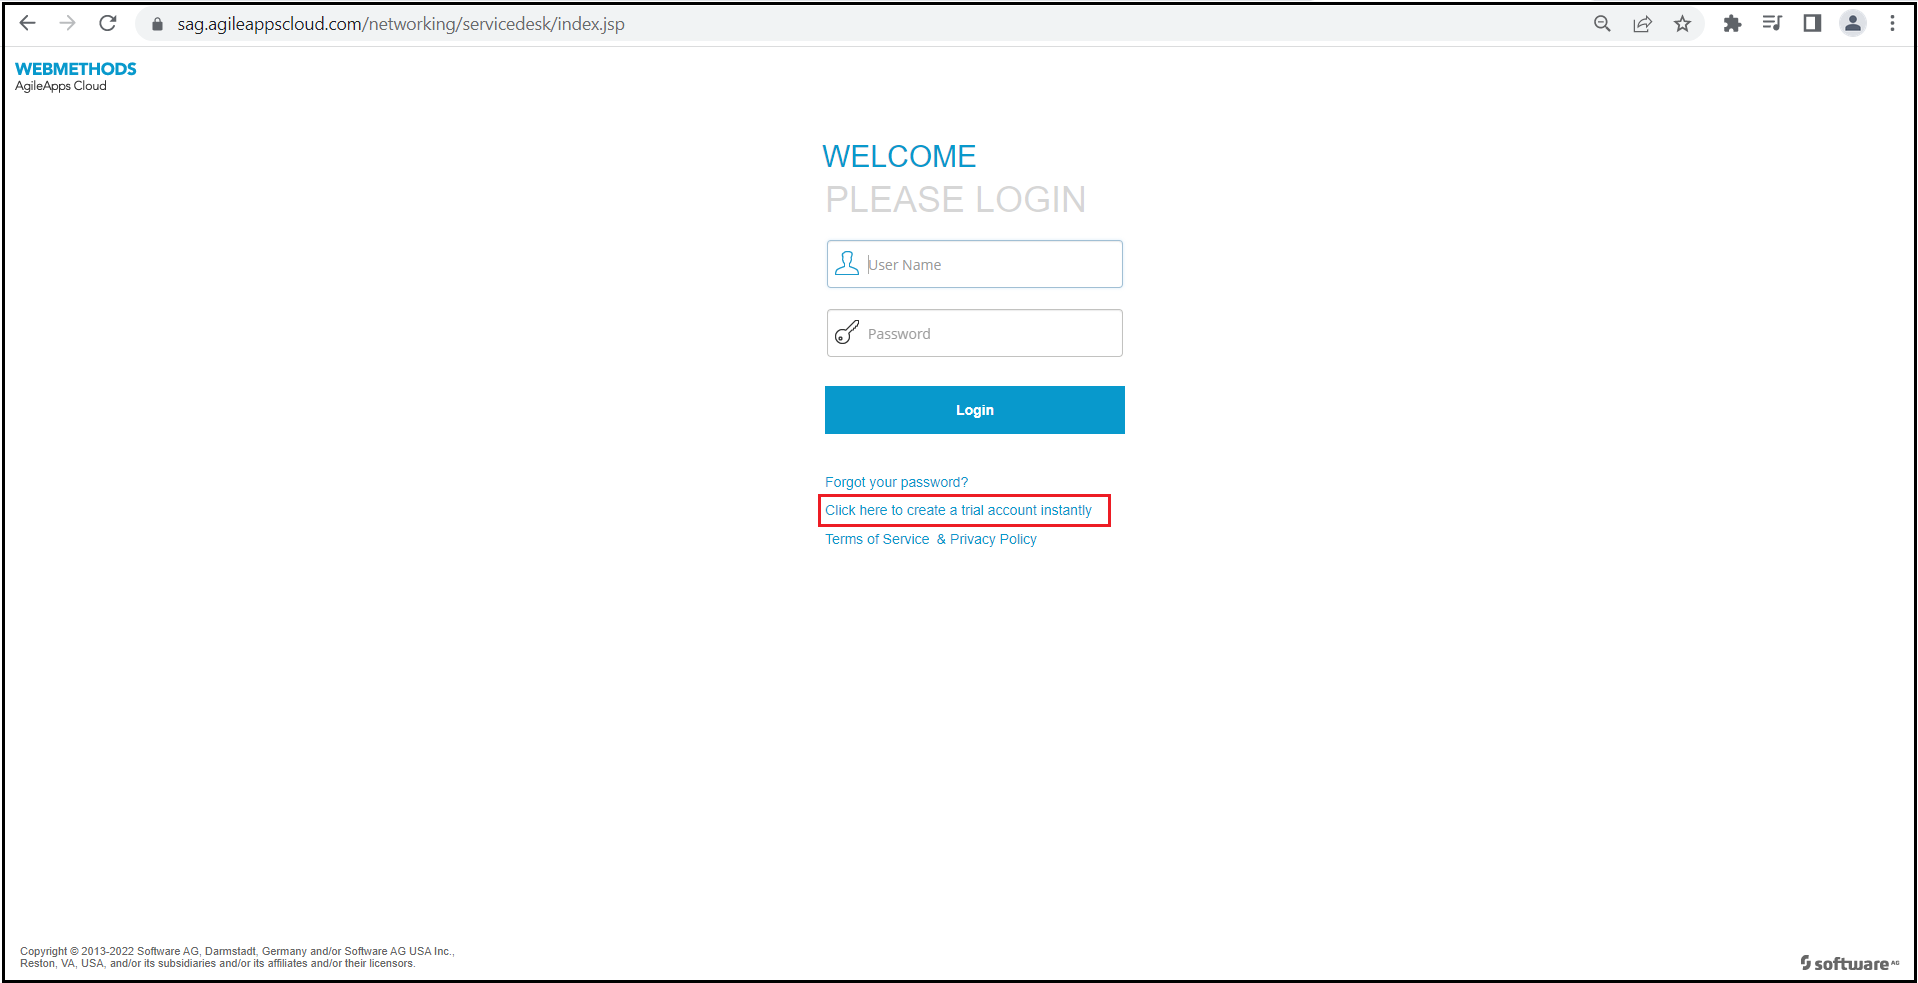
- Open a Web browser tab and connect to: http://sag.agileappscloud.com/
- Click on the link Click here to create a trial account instantly.
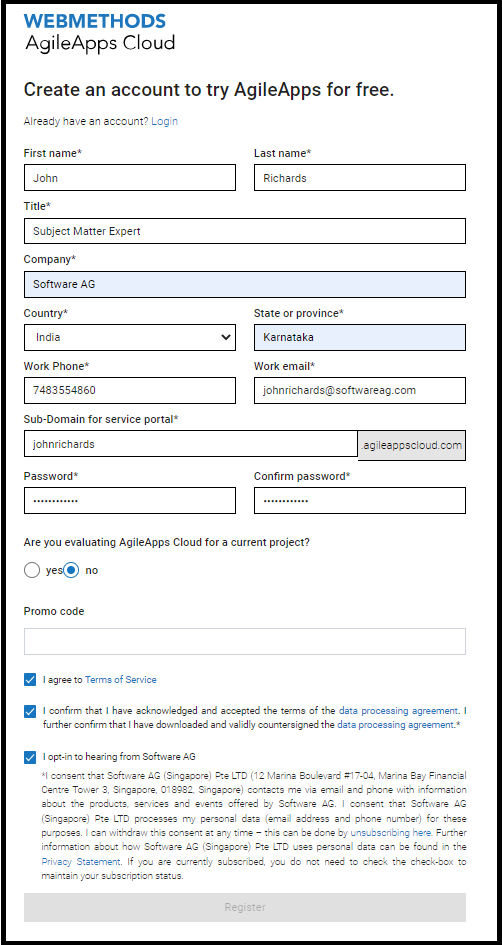
- Enter your registration information:
- For the Sub-Domain, you can use your name so that it is easy for you to remember and unlikely to already be used by someone else. For example, if your name is John Richards, you can use johnrichards as the Sub-Domain name.
- Note: This subdomain will become part of the URL you use to access your trial tenant.
- Click Register to create your own trial tenant.
- Note:Creation of your test account my take a while.
- If asked, select a security question and provide an answer.
- Your webMethods AgileApps Cloud trial tenant opens. Note that the URL has this format:
https://<your_subdomain>.agileappscloud.comorhttps://<your_subdomain>.agileappscloud.eu- For example:
https://johnrichards.agileappscloud.com - Your initial Username for a login will be the email address provided above.
- Change your personal settings:
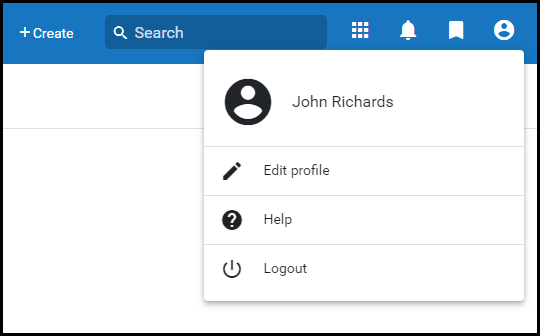
- Click your name in the upper-right menu bar and select Edit profile.
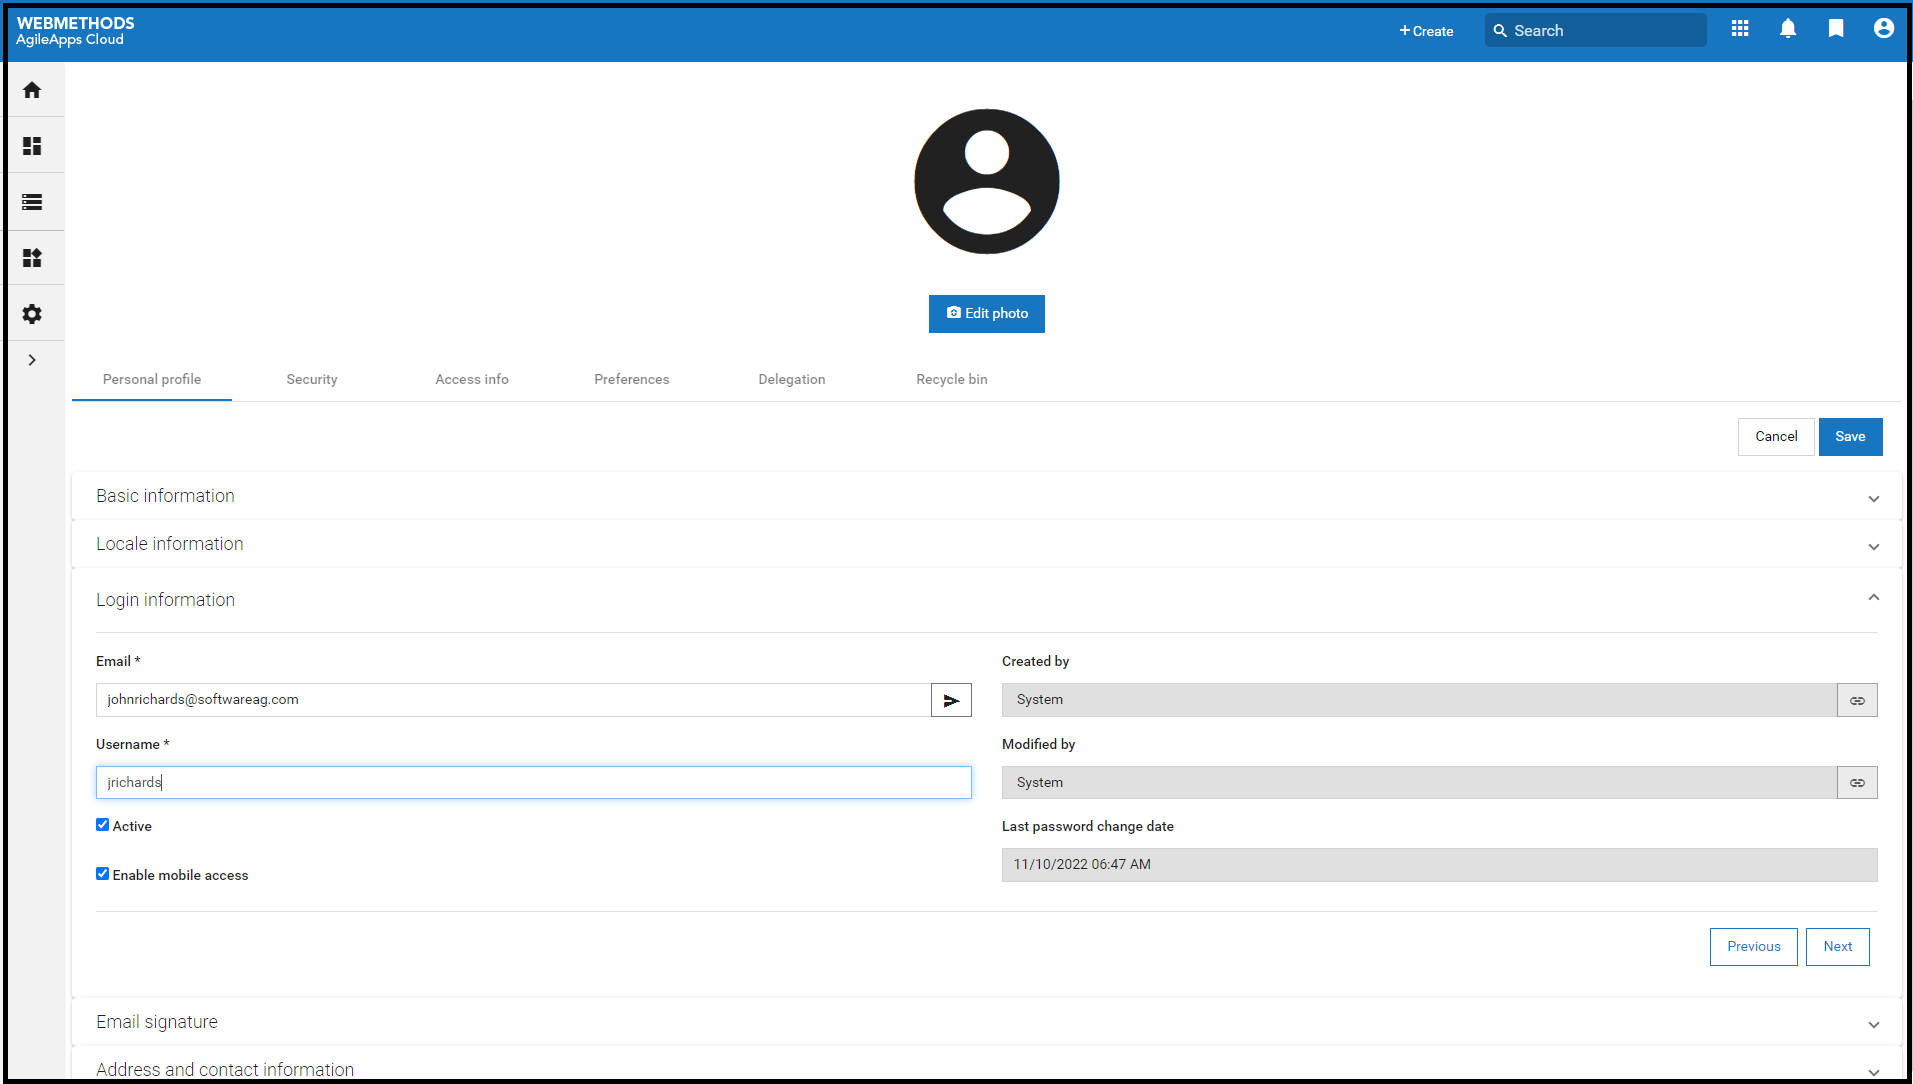
- Under Personal profile, click Login Information.
- Change your Username from your email address (the default) to a simpler username, for example, your initials.
- Make any other changes you would like to make but make sure that you leave your Access Profile as Administrator and the Email address set to your own mail address.
- For instance, adjust the Time Zone to your time zone.
- When you first create your tenant, by default you are given all privileges as specified by the Administration access profile. You learn more about Access Profiles later in this course.
- Click Save.
- Click your name in the upper-right menu bar and select Edit profile.
- As you work with the AgileApps platform, you can access the online help by going to the Configuration page, under the Help section, clicking Learn More, OR by clicking Help under the Profile on the upper right corner of the Overview page.

