Establish SSL Connection
From AgileApps Support Wiki
Revision as of 08:32, 27 October 2023 by Wikidevuser (talk | contribs)
Supported MySQL version from MySQL 5.7. In this article, we have used MySQL 5.7 for enabling SSL connection.
Prerequisites
- 1. MySQL 5.7 version must be installed in the system.
- 2. Open command prompt and connect to MySQL server by running below command.
mysql -u{user_name} -p{password}
- 3. Run the
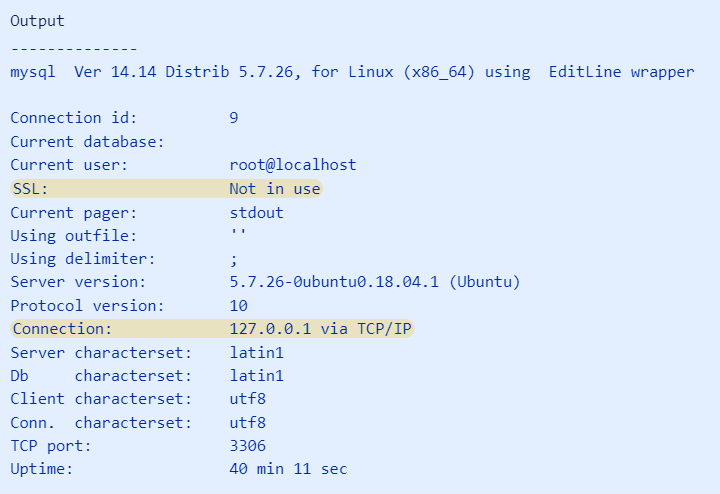
\sto view the established SSL connection. If SSL is not in use, the established connection is unencrypted.
mysql> \s
- 4. To establish the secure connection, run the below command with either "PREFERRED" or "REQUIRED" ssl mode.
mysql -u{user_name} -p{password} --ssl-mode={PREFERRED | REQUIRED}
mysql> \s
- 5. Generating SSL/TLS Certificates and Keys
- a. To enable SSL connections to MySQL, you must generate the appropriate certificate and key files. MySQL versions 5.7 and above provide a utility called mysql_ssl_rsa_setup that helps simplify this process.
sudo mysql_ssl_rsa_setup --uid=mysql --verbose
The MySQL process must be able to read the generated files, so use the --uid option to declare mysql as the system user that should own the generated files.
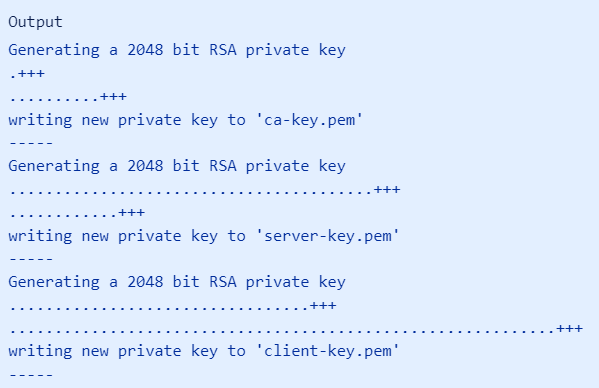
- b. The above command will produce the output that is similar to the following screenshot.
- c. These new files will be stored in MySQL’s data directory and located at
/var/lib/mysqlby default. You can check the generated files by entering the following command:
sudo find /var/lib/mysql -name '*.pem' -ls
- d. These files are the key and certificate pairs for the certificate authority (starting with “ca”), the MySQL server process (starting with “server”), and MySQL clients (starting with “client”). Additionally, the private_key.pem and public_key.pem files are used by MySQL to securely transfer passwords when not using SSL.
- 6. Enabling SSL connection on MySQL Server:
- a. Whenever MySQL starts, it looks in the MySQL data directory for the appropriate certificate filesModern versions of MySQL look for the appropriate certificate files within the MySQL data directory whenever the server starts. Due to this, you won't need to modify MySQL's configuration to enable SSL. Instead, enable SSL by restarting the MySQL service:
sudo systemctl restart mysql
- b. After restarting, open up a new MySQL session using the same command as before. The MySQL client will automatically attempt to connect using SSL, if it is supported by the server:
mysql -u root -p -h 127.0.0.1
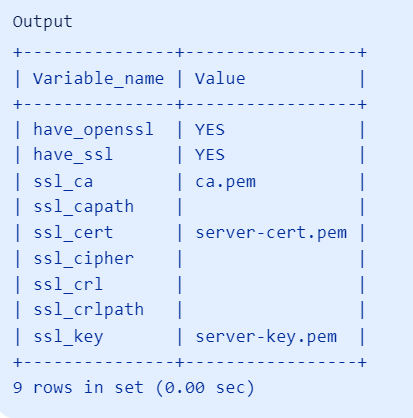
- c. Review the information that was previously requested. Check the values of the SSL-related variables:
mysql> SHOW VARIABLES LIKE '%ssl%
- d. The have_openssl and have_ssl variables now read YES instead of DISABLED. Additionally, the ssl_ca, ssl_cert, and ssl_key variables have been populated with the names of the respective files that are generated.
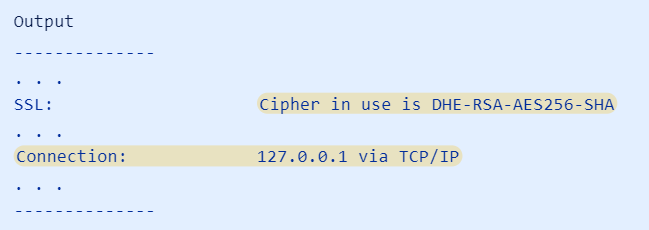
- e. Check the status of your current connection:
mysql> \s
- f. MySQL server is configured to accept SSL connections from clients. However, it will still allow unencrypted connections if requested by the client. You can change this by enabling the require_secure_transport option.
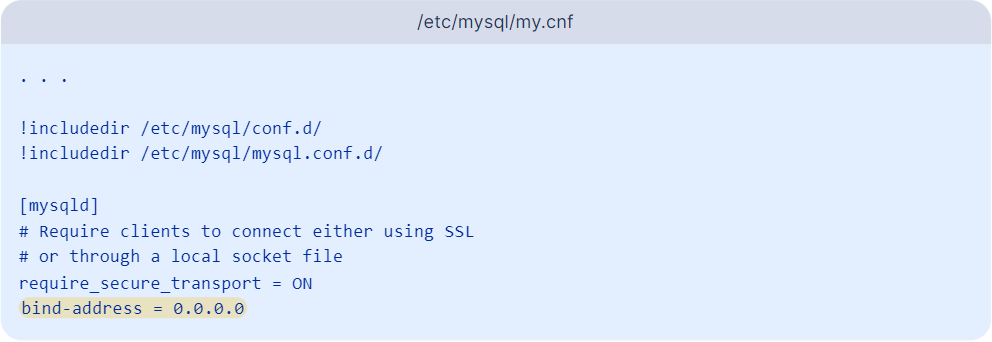
sudo nano /etc/mysql/my.cnf
- g. Start by creating a [mysqld] section to target the MySQL server process. Under that section header, set require_secure_transport to ON, which will force MySQL to only allow secure connections. In order to allow MySQL to listen for external connections, you must configure it to listen for connections on an external IP address. To do this, you can add the bind-address setting and point it to 0.0.0.0, a wildcard IP address that represents all IP addresses. Essentially, this will force MySQL to listen for connections on every interface.
Supported modes
- REQUIRED
- PREFERRED
- DISABLED
- VERIFY_CA
How to establish SSL connection in AgileApps platform?
- 1. Import the CA certificate to client JVM cacerts.
- a. To perform this action, open the command prompt.
- b. Go to cacerts path of Java and run the below command.
keytool -importcert -alias MySQLCACert -file "/var/lib/mysql/ca.pem" -keystore cacerts
- 2. Update the below two properties files with sslMode={SSL_MODE} in url key.
- a. Open the com.softwareag.catalina.resource.pid-agileappsRN.properties in the following location:
/opt/softwareag/profiles/IS_default/configuration/com.softwareag.platform.config.propsloader/com.softwareag.catalina.resource.pid-agileappsRN.properties
- Modify the url key by appending ?sslMode={SSL_MODE}
- b. Open the com.softwareag.catalina.resource.pid-agileappsRN.properties in the following location:
/opt/softwareag/profiles/IS_default/configuration/com.softwareag.platform.config.propsloader/com.softwareag.catalina.resource.pid-agileappsQuartz.properties
- Modify the url key by appending ?sslMode={SSL_MODE}
Note: Ensure that you do not leave the
sslmodeparameter value empty. If you are not sure about the secure connection, you can use PREFERRED/DISABLED mode.
