Difference between revisions of "Working with Cases"
imported>Aeric |
imported>Aeric |
||
| Line 35: | Line 35: | ||
:[[File:CaseAddNote.png]] | :[[File:CaseAddNote.png]] | ||
Starting from the right: | In addition to the icons that appear at the top of the message box, there are a variety of [[Keyboard Shortcuts#Rich Text Editor]] that can be used when editing text. | ||
Other options appear at the bottom of the message box. Starting from the right: | |||
:* Use the '''Email''' setting to send an email to the person who submitted the case | :* Use the '''Email''' setting to send an email to the person who submitted the case | ||
:: This is the default setting. | :: This is the default setting. | ||
Revision as of 23:32, 13 December 2013
Case Agents will spend the majority of their time working with Cases. This article shows how to perform the most common actions.
Creating a Case
When viewing a case list, the [New Case] button is conveniently at hand:
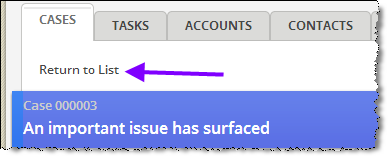
When viewing a case list, use Return to List to get back to where that button is displayed:
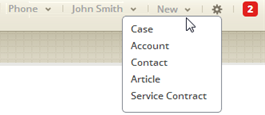
Or use the New (record) dropdown from the top of the page:
Assigning a Case to a User or a Team
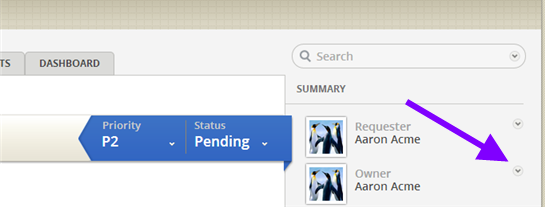
Clicking on the arrow next to the owner shows the person who currently owns the case.
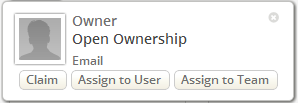
A popup appears showing the details of the current owner, if there is one. In the example shown here, the case has no owner:
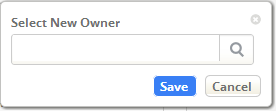
You can then choose to claim the case yourself, assign it to another individual, or assign it to a team. When you choose an assignment option, a selection dialog appears. For example, here's the dialog you see when you click [Assign to User]:
Click the magnifier icon to select a record from the list of users. If you have typed any characters, only users whose names contain those characters will be shown.
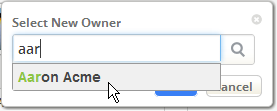
For an even easier time, type three characters from the user's name, and wait a second. A list appears showing people with those names:
You can now select someone from that list.
Respond to a Case or Add a Note
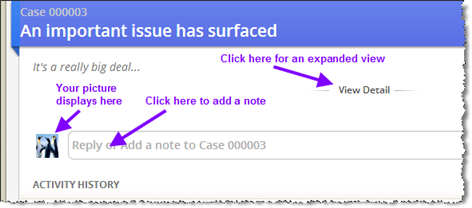
In the heading of a case, you can choose to see more detail or add a comment:
When you click in the Reply or Add a note block, the message box appears:
In addition to the icons that appear at the top of the message box, there are a variety of Keyboard Shortcuts#Rich Text Editor that can be used when editing text.
Other options appear at the bottom of the message box. Starting from the right:
- Use the Email setting to send an email to the person who submitted the case
- This is the default setting.
- The note you send automatically becomes part of the case, along with any responses that come back
- Or use the Private Note setting to add a comment that is visible only to other case workers.
- Use the Quick Text feature to insert saved snippets of text into the message
- Use [Add Recipient] to copy others
- Recipients are considered collaborators on the case
- They automatically become "followers", and are copied on all future developments
- Use [Attach File] to include an attachment (one per comment)
- When done, click [Add Note] to add the note to the case and send it to any designated recipients
Changing Case Priority and Status
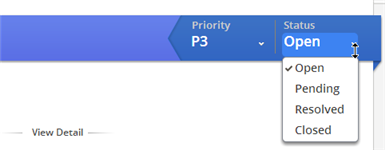
You can can change many attributes of a Case when you click View Detail. But priority and status are the values you will probably modify most frequently. Those values can be changed using the convenient drop down lists in the upper right corner of the case:
To learn more about the possible states and the transitions between them, see Case States and Transitions.
Working with Tasks
Completing Tasks is the way a Case moves forward to closure.
Completing Tasks
You can see multiple tasks at once in the Tasks tab. You can choose to see all of the tasks you are responsible for, all open tasks regardless of owner, or one of several other views.
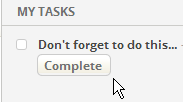
When viewing a a Case record or some other record, the My Tasks area of the sidebar shows tasks related that are relevant to that record. Click [Complete] to mark a task as done.
Working with Process Tasks
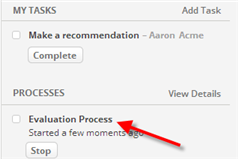
When a Process runs, it creates tasks in the sequence defined by the process model. Here, for example, an evaluation process has begun, creating a task for Aaron Acme:
Processes are listed in the sidebar, along with tasks assigned to the current user.
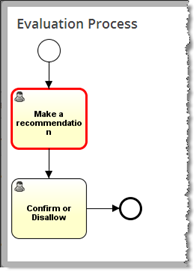
To monitor the progress of the process, click the process name in the sidebar, as shown by the red arrow in the screenshot above. When you do, a window opens, displaying the process diagram. Here, the simple two-step process is displayed, with the next task(s) to be performed highlighted in red:
Creating Tasks
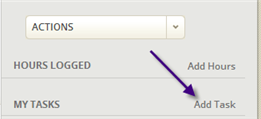
When viewing a Case record or some other record, click Add Task to begin a collaboration:
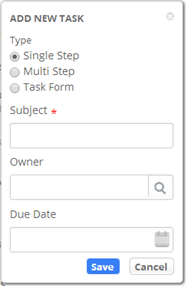
A dialog pops up that lets you choose the type of task to create:
Single Step
This option is the default. For this simple task type, you say what needs to be done, who needs to do it, and when you need it.
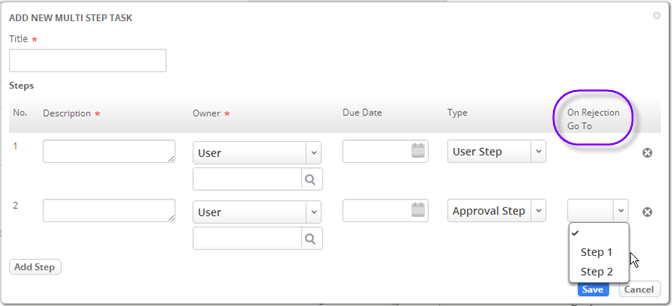
Multi Step
A Multi Step Task lets you define a sequence of steps, where each step begins only when the previous step has been done. (Each step becomes a task for the designated user. When the task is completed, a new task is generated for the next step in the procedure.)
For an approval step, you specify the point to go to if the approval request is rejected.
When approval is granted, the next step in the sequence is carried out.
Task Form
The Task Form option opens up the full Task form. This is the form you would would see if you were in the Tasks tab and you clicked [New Task]. That form lets you put more detailed instructions in the Description field. It also lets you specify values for any fields that may have been added to the Tasks object.
Taking Other Actions
Viewing Customer Details / Creating a New Contact
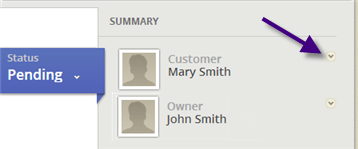
At the right is the Case Summary, showing who submitted the case, and who currently owns it:
Clicking on the arrow next to the submitter brings up submitter details stored in the case:
If the submitter is not yet known to the system, [Convert to Contact] is displayed, in place of [Contact Details]. Use that button to easily create a Contact record when someone new submits a case.
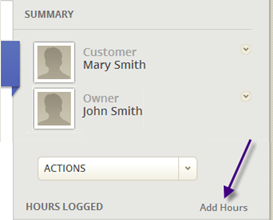
Logging Hours
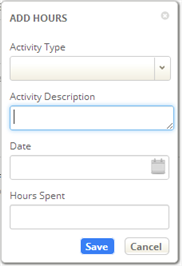
To track the time spent on a case, click Add Hours below the summary:

